Showing posts with label Desserts. Show all posts

Tuesday, July 9, 2013

Mango Cheesecake

Another way of getting rid of mangoes is to make cheesecake with mango flavor.  Since we are so conscious of weight these days, I used fat free cheesecake. Also, the crust is 1/3 less fat.  This way, we won't feel guilty having an extra slice of it.

The color is just gorgeous.


After sitting in a fridge overnight, it's ready to be eaten.


Check out my Mango Cheesecake.  You can add extra mango for garnish.  It's just delicious!


Sunday, December 11, 2011

Ba'nh Da Lon - Pig Skin Cake

Since Christmas is approaching soon, you probably get invited to a lot of parties. Usually, we would bring a dish to a party, and some people have no idea what to make. I made this and brought it to a party yesterday and it was a hit.


This whole tray of ba'nh da lon was all gone before even the party was over.

The aroma of pandan flavor and coconut milk just made this a wonderful dessert.

I added a little Christmas decoration to it in the spirit of Christmas. Pretty huh?


Sunday, July 3, 2011

No Bake Mango Mouse Cake

Summer is here!!! What's more refreshing than have a piece of tropical mango mouse for dessert? Honestly, I never thought I could make such a cake until I found the recipe from Tanya's blog. Her recipe is so easy to follow.

Yummy!


Cut your favorite fruits into different shapes and pout them around the mould.


Pour the cream cheese, with mango puree in.


Cover with food wrap


Pour another layer of mango puree on top


Take it out


Decorate it


Check out the result


Enjoy!!!

Sunday, December 26, 2010

Cassava/Tapioca Noodles - Bánh Tằm Khoai Mì

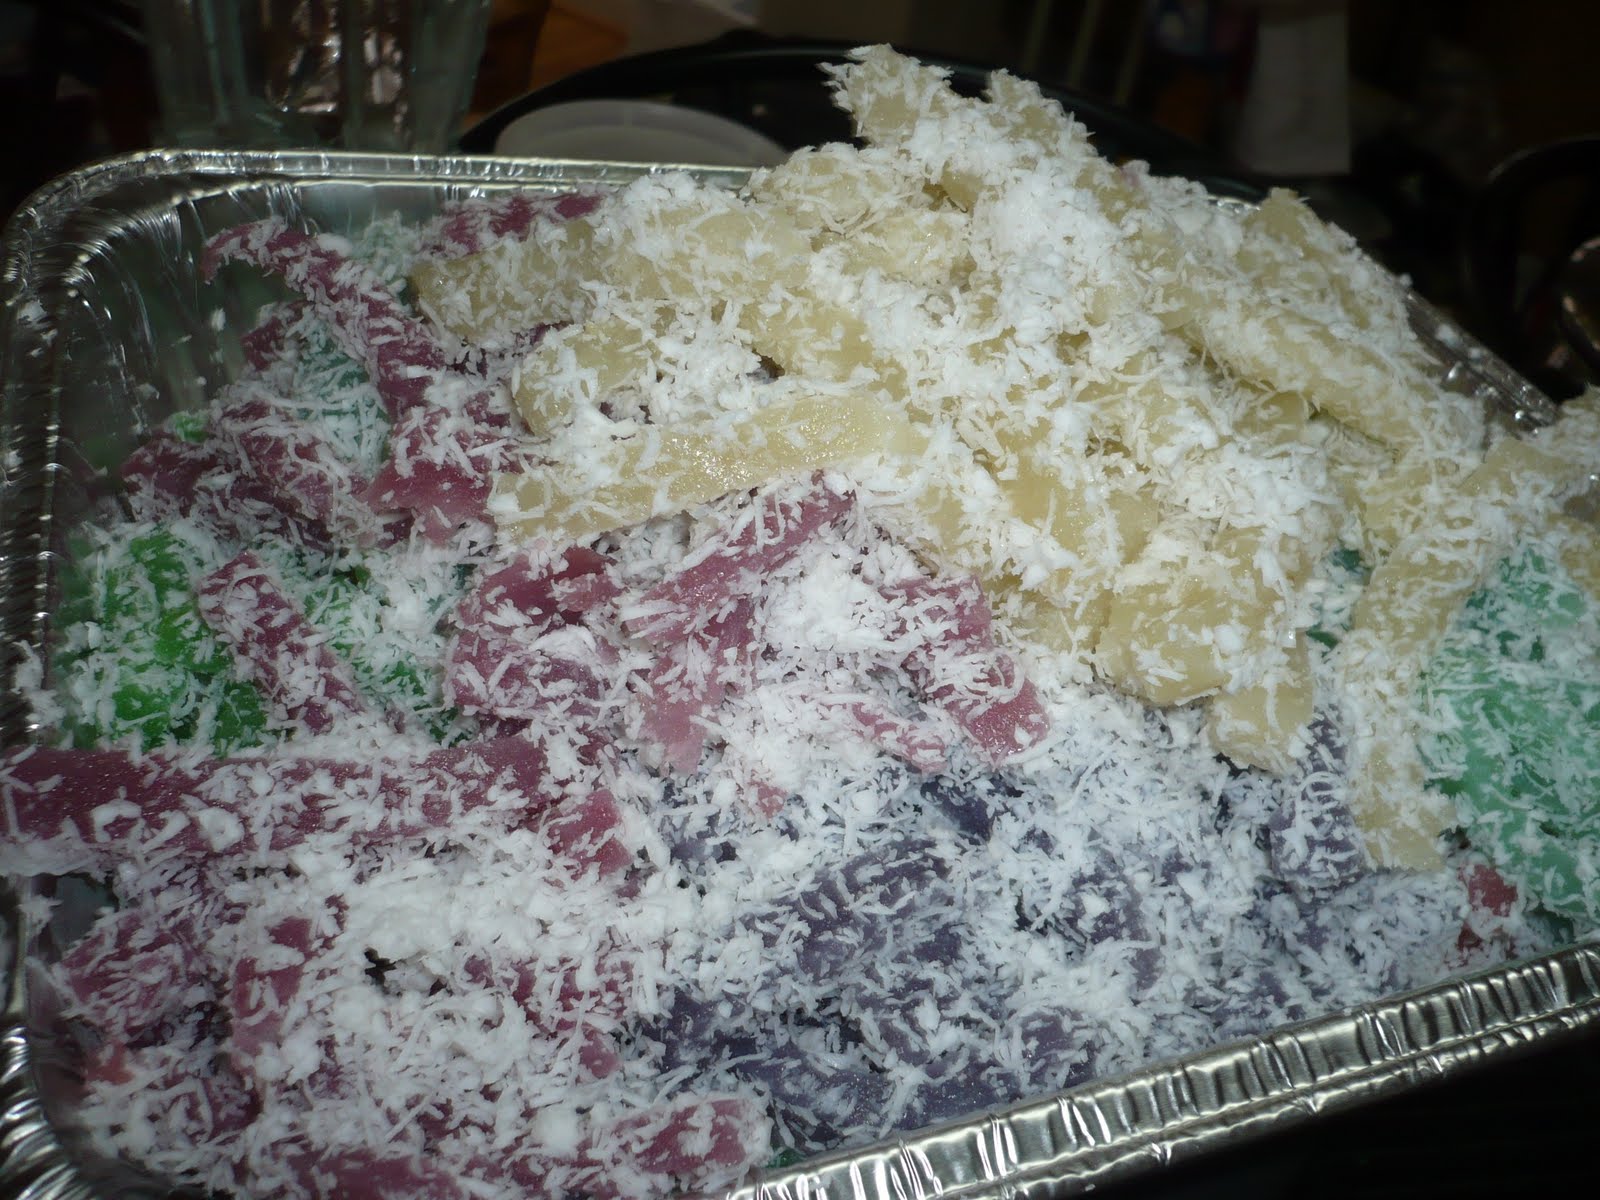
Recently, one of my readers asked if I can post cassava/tapioca noodles recipe, aka Bánh Tằm Khoai Mì. This is one of my favorite Vietnamese desserts. It has been a while since I had it. Yesterday, we had a party at my sister-in-law's house and I made this dessert. It was a hit. My hubby helped me with the food coloring. My favorite color is a combination of blue and red which will give you a beautiful purple color. Check out the presentation, pretty huh?


Divide the mixture into different bowls, and play with your food color. You can use pink, green, purple, or white. Spread the mixture (about 1 inch thick) into the pie pan after you grease it with olive oil so it won't stick.
Steam it for about 10 minutes and let it cool completely.

Once it's cooled, cut the cassava cake into strips of noodle.

Pour one bag of grated coconut into a bowl, and roll them into the grated coconut one by one so they won't stick together.


Continue to steam and cut the dessert until you are done.

I have white, purple, green and pink. For the green color, you can use pandan paste.


Ingredients:
a. 5 lbs of grated cavassa
b. 1 + 1/4 cup of tapioca flour
c. 3/4 cup of corn starch
d. 2 cup of sugar and a pinch of salt
e. 2 can of coconut milk
f. 2 bag of grated coconut
g. 1 bag of long strip of coconut (for decoration/garnish)
h. sesame seeds (for garnish)

Method:
1. Pour out the grated cassava in a big bowl
2. Add some cold water
3. Use a piece of fabric and scoop some of the cassava into it
4. Squeeze out all the water from the cassava
5. Put the cassava into a big bowl
6. Add tapioca flour, corn starch, sugar, coconut milk, and pinch of salt into the bowl (ingredients from b-e)
7. Divide the mixture into 4 bowls
8. Add different colors to each bowl (note: red + blue = purple)
9. Grease your pie mold and spread the mixture about one inch into the mold
10. Steam it for 10 minutes or until done
11. Cool the cake completely before cutting
12. Roll them in grated coconuts one at a time to prevent them from sticking
13. Mix all of the strip of noodles together and garnish with long strips of coconut
14. Use for garnish : in a bowl, add sesame seeds, a little bit of sugar, and salt

Enjoy!

Monday, May 31, 2010

Flan


Chè Bắp - Vietnamese Corn Pudding

Chè Bắp is basically Vietnamese corn pudding with tapioca pearls and coconut milk. Corn is in season so I have to make this Vietnamese dessert. I got the recipe from Mrs. Apple from another forum. She gave me a great tip. She suggested that I used half bag of fresh pandan and extracted the juice out from the leaves . Then added to the pot. And I did.

Wow! It tasted so good! The aroma of fresh pandan juice added extra flavor to this dessert. This can be served with coconut milk.


Here is the whole pot. The sweetness of the corn combines with the wonderful pandan juice. This dessert is out of this world.


Ingredients:
5 corns
1/2 cup of sweet rice
1/2 cup of tapioca pearls (small kind)
1 teaspoon of fresh pandan juice
1 can of coconut milk
1 teaspoon of salt
2 teaspoon of tapioca flour
2 tablespoon of condense milk
8 cups of water

Method:
1. Remove the corn from the cob.
2. Cook the tapioca pearls and let it drain in the bowl.
3. Add the sweet rice to the pot, and add 8 cups of water (cook for 15 min)
4. Add salt in the pot.
5. Add in the corn and let it cook until soft. (15-30 minutes)
6. Add in the sugar, and add in the tapioca pearls (mix well )
7. Add 2 TB of tapioca flour with 1/2 cup of water and mix together in a small bowl.
8. Pour the tapioca flour mixture to the pot
9. Add in the pandan juice and mix well.
10. Serve with coconut milk

Coconut milk:
1. Add one can of coconut milk in the sauce pan.
2. Add 1/4 teaspoon of salt
3. Add 2 TB of condense milk
4. Add 1 teaspoon of tapioca flour with a little bit of water in a container and then add to the saucepan.

Enjoy!


Saturday, March 20, 2010

Saturday, January 30, 2010

Mango & Jackfruit - Home Made Ice Cream

Last month, my hubby bought an ice cream maker for me. Wow! The whole idea of making my own ice cream does not really make sense to me. Why? I said to myself. I could of just gone to any grocery stores and bought some. I have been staring at that ice cream maker for the longest time.

Here is my first home made ice cream - Mango and Jackfruit flavor. Voila` . Yummy!


Why make your own ice cream? Well, there are many advantages of making your own ice cream. The first one I can think of is you have control over the amount of FAT and SUGAR you put in your ice cream. In addition, you can pick the freshest fruits you like and create any exotic flavors of ice cream you want. Being able to choose your own ingredients give you the option of creating rich and tasty low fat versions of your favorites. Also, you can adjust or add anything to suit your taste. And the most important reason for me was FUN. I have so much FUN during the whole process of making my own ice cream. :-)


Enjoy!

Sunday, December 20, 2009

Blueberries Cheese Cake

I got stuck in the house due to the snow. Check out this snowman we put together in 2 seconds. After we shoveled the snow, I made a blueberries cheese cake.


It doesn't look pretty as the store bought, but it tastes awesome.


Here is a slice for you.

A closer look.

Another slice for my hubby.


Ingredients: Make 2 cheese cakes
2 (8oz) cream cheese (you can use non-fat cream cheese if you like)
2 (6oz) crumb crust (ready crust by keebler - you can buy this at any grocery stores.)
1/4 cup of condense milk
1 lime juice
1/2 stick of butter
3 eggs
1/4 cup of milk (I don't have any milk at home so i used whipping cream.)
1/4 cup of blueberries (I use a blender and puree it)

Method:
1. In a bowl, mix cream cheese and eggs together.
2. Add the condense milk along with eggs.
3. Add milk and blueberries.
4. Add lime juice and butter
5. Pour in the crumb crust
6. Preheat oven 350 and lower to 325 degree.
7. Bake for 35-45 minutes and turn off the oven.
8. Let it cool for an hour.
9. Put in the fridge and ready to serve.

This cream cheese is just right, not too sweet. Enjoy!

Friday, December 18, 2009

Tiramisu - Italian Dessert

We had a Christmas pot luck luncheon at work yesterday, and I made tiramisu. Since one of the member in our group prefers tiramisu without eggs, I decided to use Gert's recipe. Her tiramisu recipe has no eggs in it. And instead of RUM I used coffee liqueur. It was perfect.


It was a challenge looking for lady fingers at the grocery stores. Therefore, I baked them from scratch.

After I put the cake together, it was placed in the fridge overnight.

The next morning, I garnished them with strawberries and blueberries. This was a great idea. Pretty huh? :-)

Ta taaaaaaaaaaaaaaaaaa.....DONE.

Check it out.

Delish! Everyone loved it. Yummy................


Below is the recipe from Gert.

Ingredients :

2 tub 8oz mascarpone cheese
1 tbsp of coffee liqueur ( I put 2 tbps)
8 tbsp of sugar (you can add more)
450 ml of heavy cream (I used 4 cups)
1 cup of hot strong brewed coffee
1/4 cup of dark rum (I don't have dark rum so I did omit this.)
48 lady fingers (more or less) ---I baked my own since I can't find them anywhere.
unsweetened cocoa powder

Decoration :

Strawberries, raspberries and lady fingers ( Instead of raspberries, I used blueberries.)


1) In a mixing bowl whisk the whipping cream with 4 tbsp of sugar until firm peak. set aside.
2) In a second mixing bowl cream the mascarpone, coffee liqueur and 4 tbsp of sugar
3) Fold the whipping cream into the mascarpone cheese and set aside
4) Mix the coffee and dark rum. Dip lady fingers into coffee mixture and place in the bottom of the baking dish or spring form pan.
5) Spread some cream cheese mixture over the ladyfingers and dust with cocoa powder.
6) Dip some ladyfingers into coffee mixture and repeat step '5' again.
7) Cover and refrigerate tiramisu overnight.
8) Just before serving decorate it with some cocoa powder or fresh fruits.

Tuesday, November 17, 2009

Tofu Pudding (Tofu Fa)

Bean curd gelatin or Tofu pudding - or "tofu fa" in Cantonese is a great treat for many folks. If you go to a Chinese restaurant for dim-sum, they will have this. Back in Vietnam, I used to order this every morning for breakfast. It's nice to have a bowl of hot tofu pudding in the morning. A lot of folks think it's hard to make this Tofu pudding. In reality, it's so simple.

You need a box of SoyBean Curb mix. In this box, it comes with 2 packages. A big package and a small package.


Check out a bowl of tofu-fa with pandan flavor. I added a touch of coconut milk and brown sugar with ginger syrup. Chinese folks eat this without coconut milk. Vietnamese folks adds coconut milk to their tofu-fa. It's your choice. You can eat with or without it. I like mine with coconut milk .

Mix a big package of tofu-mix with 5 cups of water and stir-well . Bring it to a boil and turn off the stove. Add a few drops of pandan flavor in (optional). Then add the small package in and stir well. Cover with plastic wrap or allumnium foil and let it sit for 30-45 minutes. See the result below.

Brown Sugar Syrup - You need a package of brown sugar; 1-1&1/2 cup of water and ginger. Bring it to a boil and let it simmer for 30 minutes.


And voila, Tofu-fa is ready. This bowl is without coconut milk.


To make the coconut milk, you need a can of coconut milk (14oz). Pour the coconut milk in the small sauce pan. Add a 1 cup of water and stir-well. Bring it to a boil and Add 2 TBS of corn starch, and a little salt and sugar. The consistency of the coconut milk depends on how much water you put in. If you like it less dense, add more water. If you like it watery, add more water.